October 13, 2023
Can you just change brake discs?
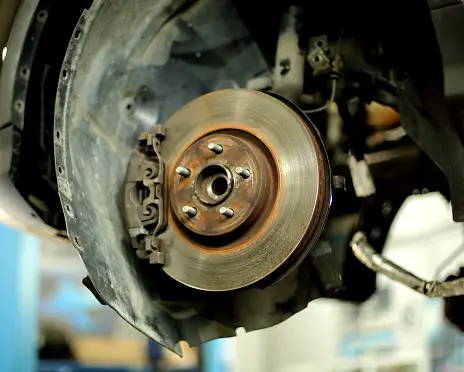
Yes, you can change brake discs, but it’s important to do so properly and safely. Brake discs, also known as brake rotors, are a crucial component of a vehicle’s braking system, and they play a vital role in stopping the vehicle. If you’re considering changing the brake discs on your vehicle, here are the general steps to follow:
- Gather the necessary tools and materials:
- New brake discs (rotors)
- Brake pads (often recommended to replace them when changing the discs)
- Jack and jack stands
- Lug wrench or socket set
- C-clamp or brake caliper tool
- Brake fluid (if necessary)
- Torque wrench
- Brake cleaner
- Brake grease or anti-squeal compound
- Safety first:
- Park your vehicle on a flat and level surface.
- Engage the parking brake and chock the wheels to prevent the car from rolling.
- Wear safety glasses and gloves to protect yourself.
- Remove the wheel:
- Loosen the lug nuts of the wheel you’ll be working on but do not remove them completely.
- Lift the vehicle:
- Use a jack to lift the vehicle off the ground and place it securely on jack stands.
- Remove the brake caliper:
- Locate the brake caliper, which is usually held in place by bolts or slide pins.
- Remove the caliper bolts and carefully suspend the caliper using a piece of wire or a bungee cord, so it doesn’t hang by the brake line.
- Remove the old brake disc:
- The brake disc is typically held in place by one or more bolts or screws.
- Remove these fasteners and then take off the old brake disc.
- Install the new brake disc:
- Clean the new brake disc with brake cleaner to remove any protective coating.
- Slide the new brake disc onto the wheel hub and secure it with the appropriate fasteners.
- Install new brake pads (recommended):
- If you’re changing the brake discs, it’s a good idea to replace the brake pads as well. Follow the manufacturer’s instructions for installing the new brake pads.
- Reinstall the brake caliper:
- Slide the brake caliper back over the new brake disc.
- Tighten the caliper bolts or slide pins to the manufacturer’s specifications.
- Put the wheel back on:
- Place the wheel back onto the wheel hub and hand-tighten the lug nuts.
- Lower the vehicle:
- Carefully lower the vehicle off the jack stands using the jack.
- Torque the lug nuts:
- Use a torque wrench to tighten the lug nuts to the manufacturer’s recommended torque specification in a crisscross pattern.
- Pump the brake pedal:
- Before driving the vehicle, pump the brake pedal several times to ensure the brake pads make contact with the new brake discs.
- Test the brakes:
- Take the vehicle for a test drive in a safe and empty area to ensure the brakes are working correctly.
Always consult your vehicle’s repair manual and follow the manufacturer’s recommendations for specific torque values, procedures, and safety precautions, as these can vary depending on the make and model of your vehicle. If you are not confident in your ability to perform brake work, it’s advisable to seek professional assistance from a qualified mechanic. Brake systems are critical for safety, and any mistakes during brake maintenance can have serious consequences.

Is it easy to change your own brake discs?
Changing your own brake discs (rotors) can be a manageable DIY task for individuals with some mechanical aptitude and the right tools. However, whether it’s considered easy or not depends on your level of automotive experience and comfort with basic car maintenance tasks. Here are some factors to consider:
- Skill Level: If you’ve never worked on your car before or have limited experience, changing brake discs might be challenging. It involves removing and reinstalling brake calipers, brake pads, and various fasteners, and it requires attention to detail and safety.
- Tools: Having the right tools is essential. You’ll need a jack, jack stands, lug wrench or socket set, torque wrench, C-clamp or brake caliper tool, brake cleaner, brake grease, and potentially more, depending on your specific vehicle.
- Safety: Brake work is critical for safety, so it’s crucial to follow proper procedures and safety precautions. If you’re not confident in your abilities, it’s safer to seek professional help.
- Vehicle Knowledge: It helps to have some understanding of your vehicle’s braking system and how it operates. Consult your car’s repair manual for specific instructions related to your vehicle’s make and model.
- Time and Patience: Changing brake discs can take some time, especially if you’re doing it for the first time. Be patient and allow yourself enough time to complete the task properly.
- Brake Pad Replacement: Often, it’s recommended to change brake pads when changing brake discs since they wear together. This adds to the complexity and cost of the job.
- Rust and Corrosion: Depending on your vehicle’s age and climate, brake components can rust and become challenging to remove. Dealing with rust can make the job more time-consuming.
- Quality Parts: Ensure you use high-quality replacement parts to maintain brake performance and safety.
If you’re mechanically inclined, have the necessary tools, and are willing to carefully follow step-by-step instructions from a reputable source, you may find changing brake discs to be a feasible DIY project. However, if you’re unsure about any aspect of the job or have concerns about your ability to do it safely and correctly, it’s advisable to have a professional mechanic perform the work. Brake systems are critical for your safety on the road, and any mistakes during brake maintenance can lead to serious consequences.
