July 9, 2023
How to Charge Your Car Battery at Home?
To charge your car battery at home, you can follow these general steps:
- Safety precautions: Before you start, make sure you are in a well-ventilated area and wearing appropriate safety gear, such as gloves and safety glasses.
- Gather the necessary equipment: You’ll need a battery charger designed for automotive batteries. Make sure the charger is compatible with your car’s battery type (lead-acid, AGM, gel, etc.). Read the charger’s manual for specific instructions.
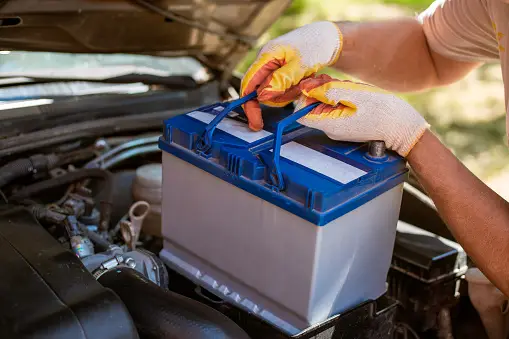
- Locate the battery: In most vehicles, the battery is located under the hood. However, in some cars, it may be in the trunk or under a seat. Consult your vehicle’s manual if you’re unsure.
- Prepare the battery: Ensure the ignition is turned off, and any accessories or lights are also switched off. Remove any covers or protective caps from the battery terminals.
- Connect the charger: Identify the positive (+) and negative (-) terminals on the battery. The positive terminal is usually red, and the negative terminal is usually black. Connect the charger’s positive clamp to the positive terminal of the battery, then connect the negative clamp to the negative terminal.
- Set the charger: Follow the charger’s instructions to select the appropriate charging mode and voltage based on your battery type and the charger’s features. Some chargers may have an automatic mode that adjusts the charging rate based on the battery’s needs.
- Start the charging process: Once the charger is properly set up, plug it into a grounded electrical outlet. Turn on the charger and let it run until it reaches a full charge. Charging times can vary depending on the charger and the battery’s condition. It’s recommended to refer to the charger’s manual for estimated charging times.
- Monitor the process: Keep an eye on the charger and battery while charging. If you notice any signs of overheating, strange odors, or other abnormalities, immediately disconnect the charger and consult the manual or a professional.
- Charging completion: Once the battery is fully charged, turn off the charger and unplug it from the electrical outlet. Disconnect the charger’s clamps from the battery terminals, starting with the negative (-) clamp first and then the positive (+) clamp.
- Post-charging checks: Inspect the battery terminals for any corrosion or dirt. If necessary, clean the terminals using a battery terminal cleaner or a mixture of baking soda and water. Rinse with clean water and dry with a cloth.
Remember, these steps are general guidelines, and it’s essential to refer to the specific instructions provided with your battery charger for accurate and safe charging procedures. If you’re unsure or uncomfortable with the process, it’s recommended to seek assistance from a professional mechanic or battery specialist.
How can I charge my 12v car battery at home?
To charge a 12V car battery at home, you can follow these steps:
- Safety precautions: Ensure you are in a well-ventilated area and wearing appropriate safety gear, such as gloves and safety glasses.
- Gather the necessary equipment: You will need a battery charger designed for 12V automotive batteries. Make sure the charger is compatible with your battery type (lead-acid, AGM, gel, etc.). Refer to the charger’s manual for specific instructions.
- Locate the battery: The battery is typically located under the hood of the car. However, in some vehicles, it may be in the trunk or under a seat. Consult your vehicle’s manual if you’re unsure.
- Prepare the battery: Turn off the ignition and any accessories or lights. Remove any covers or protective caps from the battery terminals.
- Connect the charger: Identify the positive (+) and negative (-) terminals on the battery. The positive terminal is usually red, and the negative terminal is usually black. Connect the charger’s positive clamp to the positive terminal of the battery, then connect the negative clamp to the negative terminal.
- Set the charger: Follow the charger’s instructions to select the appropriate charging mode and voltage for a 12V battery. Some chargers have an automatic mode that adjusts the charging rate based on the battery’s needs.
- Start the charging process: Plug the charger into a grounded electrical outlet. Turn on the charger and allow it to charge the battery until it reaches a full charge. Charging times can vary depending on the charger and the battery’s condition. Refer to the charger’s manual for estimated charging times.
- Monitor the process: Keep an eye on the charger and battery while charging. If you notice any signs of overheating, strange odors, or other abnormalities, immediately disconnect the charger and consult the manual or a professional.
- Charging completion: Once the battery is fully charged, turn off the charger and unplug it from the electrical outlet. Disconnect the charger’s clamps from the battery terminals, starting with the negative (-) clamp first and then the positive (+) clamp.
- Post-charging checks: Inspect the battery terminals for any corrosion or dirt. If necessary, clean the terminals using a battery terminal cleaner or a mixture of baking soda and water. Rinse with clean water and dry with a cloth.
Remember, it is important to follow the specific instructions provided with your battery charger for accurate and safe charging procedures. If you are uncertain or uncomfortable with the process, it is recommended to seek assistance from a professional mechanic or battery specialist.